Please note that a paid hosting product is required to access your emails using the email program (POP or IMAP). is needed. Alternatively, you can use our free webmail.
Before you can integrate your email address into Outlook, you must first create your email address with a mailbox. You can find out how to do this in this article
Mail setup in Outlook
This function only works if you have not saved autoconfig in your DNS settings. If this is stored, you do not need to set any advanced settings and can therefore skip the third step. First, open your Outlook and go to File in the top right and then to Account Information.
Once there you will find the Add Account
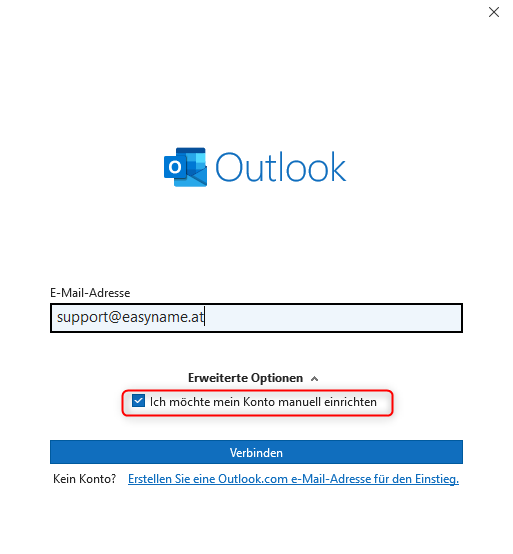
buttonYou can now enter your email address above. Please note that you must tick the box during manual configuration!
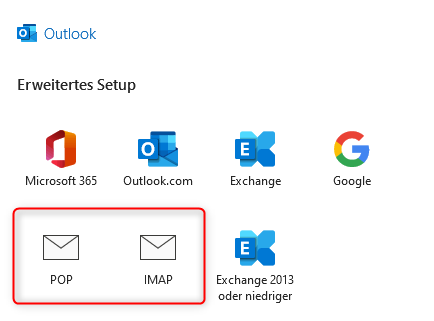
In the next step, select the type of connection to the server. Here you can choose between IMAP or POP.
We recommend connecting via IMAP. This means that the mailbox is not automatically deleted after the emails have been retrieved.
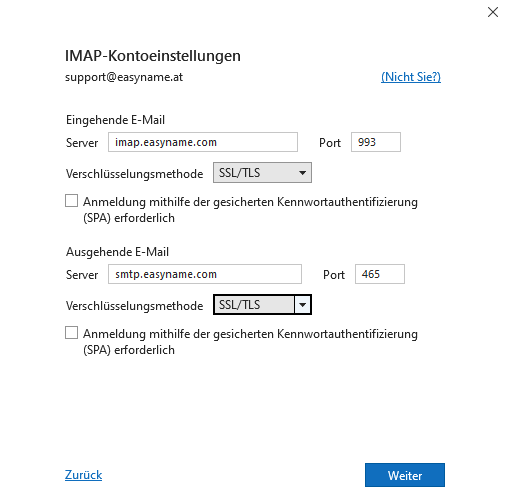
You will reach the advanced setup settings. Here you must specify the host name as well as the ports and their encryption method.
The necessary data can be found in the Controlpanel under Webhosting in the Data Sheet subtab .
For Cloudpit customers, you can find this in the web hosting administration under Email → E-mail addresses above under Connection data.
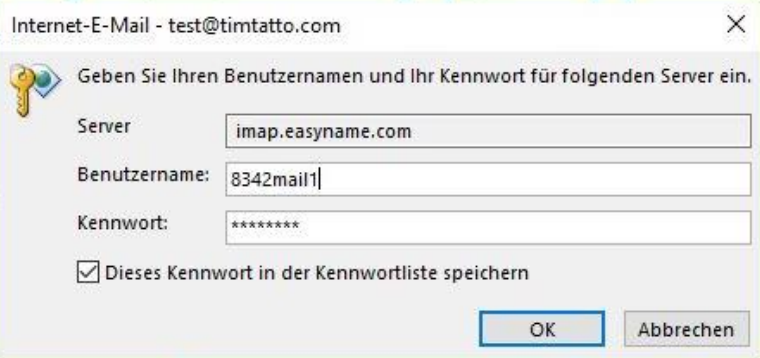
You will only be asked for the user name and password for the mailbox in a further step (possibly only after two attempts). Please note that the mailbox name is not your email address (e.g.: 1234mail1)
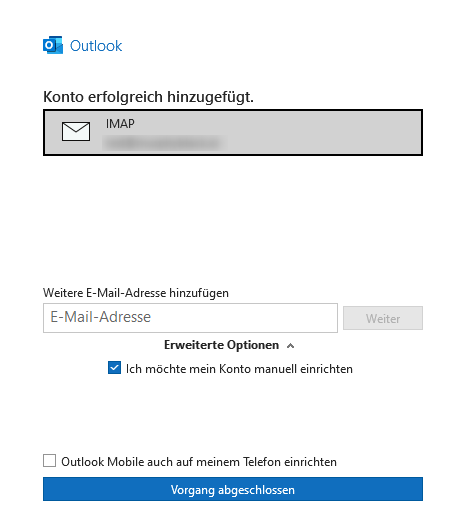
A connection to our server is now being established. If all data is set correctly, you will receive the following success message
The setup is now complete. To check functionality, Outlook automatically sends a test message.
If you cannot find something in the article or have further questions, we will be happy to help you by telephone or Email available.
Feedback on the article:
Did the article contain the information you were looking for?
