Table of contents
Nearly everyone will be aware of the General Data Protection Regulation (GDPR), which came into force in 2018 – one of the necessities it has brought with it is SSL encryption. In this article we explain how to switch your WordPress website from http to https (SSL).
But what is SSL and why do I need it? There are a range of reasons from data security and trustworthiness to search engine optimisation and ranking criteria. You can find more details here.
In this article we will discuss how to switch your WordPress website to SSL:
As you may know, you can change your page URL in WordPress under “Settings > General”. Theoretically, it would be enough if you replaced “http” with “https” there. However, as WordPress inserts the full link wherever you include an image or link – e.g. http://deine-url.at/wp-content/uploads/2020/05/image.jpg- you need to replace the “http” with “https” wherever your URL appears.
To avoid going through each page individually, you can use a plugin that does the work for you. You just need three things:
- the “WP Migrate DB” plugin from Delicious Brains https://wordpress.org/plugins/wp-migrate-db/
- a free SSL certificate in your easyname account (you can see if you still have one available under Webhosting > Subdomains)
- a backup of your database (we will do this together in Step 2)
Let’s take it one step at a time:
Step 1: Install the plugin
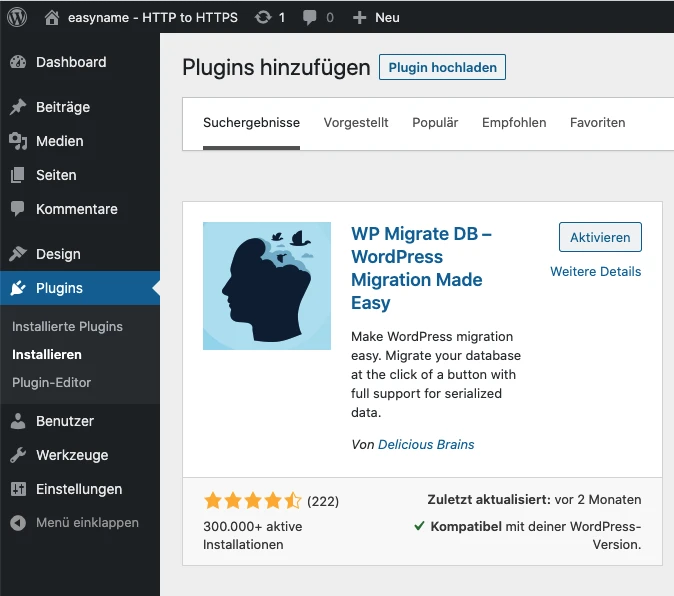
First download, install and activate the “WP Migrate DB” plugin. You can find the plugin in the WordPress plugin directory under “Plugins > Install” – search for “WP Migrate DB”.
Step 2: Create backup
Before you rewrite your URL everywhere, you need to create a backup. This database backup can be restored if something goes wrong.
When you have activated the plugin, go to “Tools” and search for “Migrate DB” in the submenu.
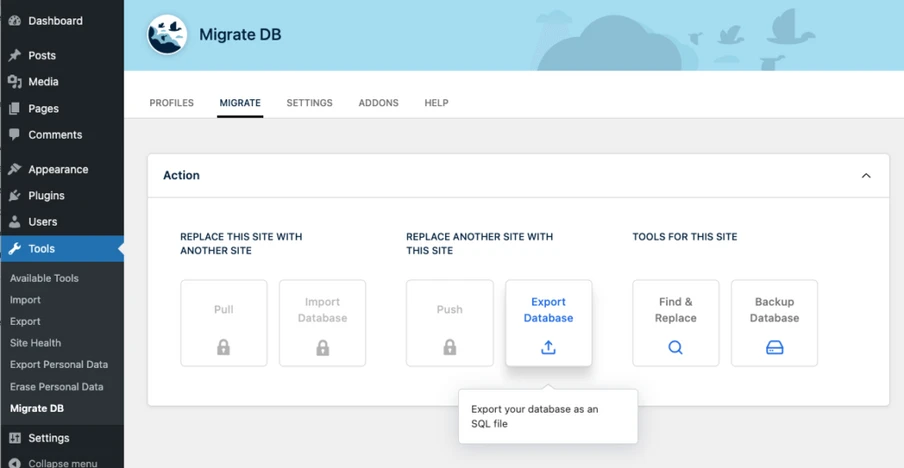
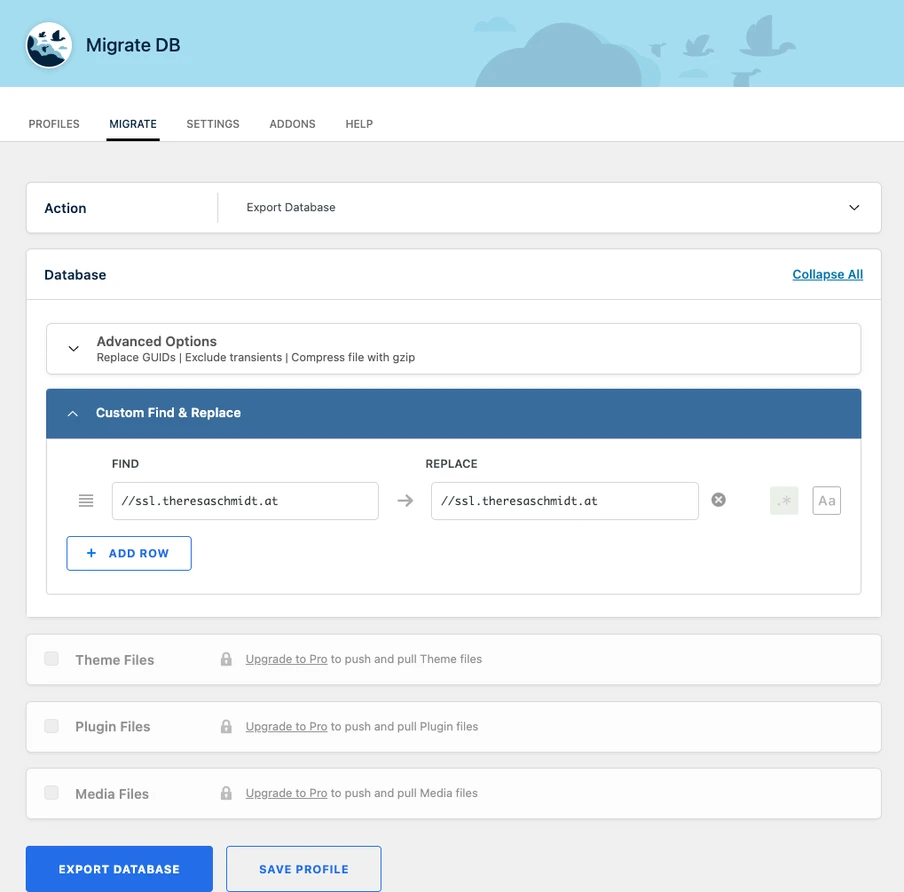
Now make sure that the “Export File” option is selected.
The first field is the URL of your site: //ssl.easynametest.com. The two // mean that both “http” and “https” are considered when exporting. You don’t have to change anything here.
The second field is the absolute path of your website and is not important for you. You can also remove this field row by clicking on the “x”.
Please note: Always use the exact address that is suggested to you here: if this field contains e.g. //www.ssl.easyname.com, then please continue with this address.
Now click twice on both arrows between the fields, so that the same thing appears in the fields next to each other. We do not want to replace anything yet.
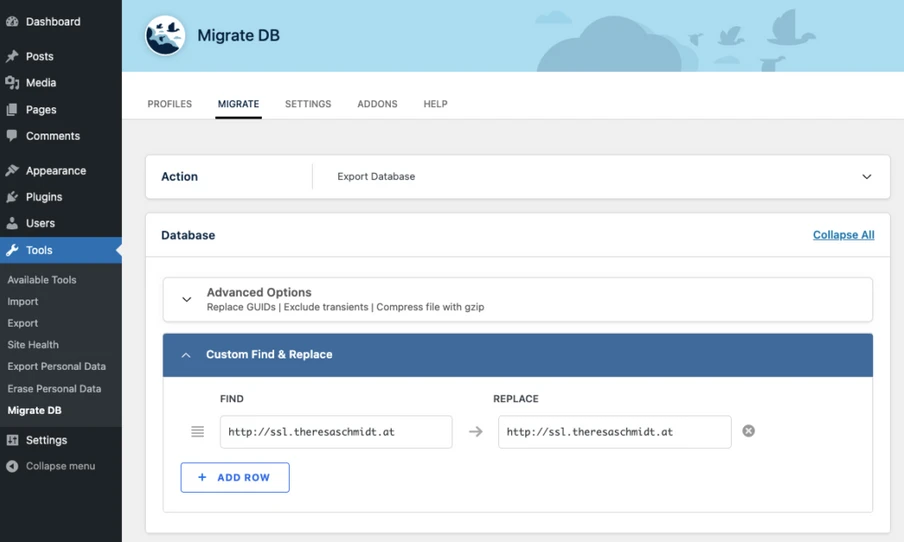
Now click on the blue “Export” button at the bottom of the page.
Depending on the size of your website database, the export will take some time. When it is finished, you will be prompted to save the .gzip file to your computer.
Step 3: Replace http with https
We now want to change your URL from http://ssl.easynametest.com to SSL (https) everywhere in the database: https://ssl.easynametest.com.
To dos so, select the option “Find & Replace”.
Now write your URL with http in the “Find” field e.g. http://ssl.easynametest.com and your URL with https in the “Replace” field, e.g. https://ssl.easynametest.com.
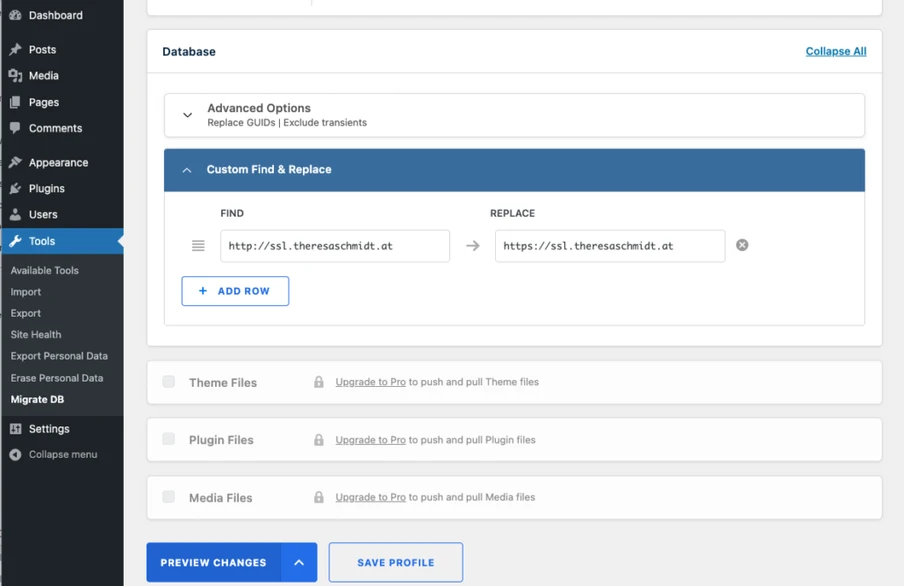
Now you replace the exact URL that is in “Find” with the address in “Replace”. Please make sure that there is no slash “/” at the end of your address, otherwise your replacement will not work properly.
Note: this action changes all occurrences of your page URL and cannot be undone except by importing the backup. Therefore, make sure that you have entered the correct address (e.g. that there is no slash “/” at the end and that you have taken the correct page address – with or without “www”)!
Now you can click on the blue “Find & Replace” button.
Depending on the size of your database, this process may take more or less time. When the plugin displays “complete” in a popup, you can close the window.

Step 4: Enable SSL
You may be logged out now. That doesn’t matter, because first we will activate the SSL certificate in your easyname control panel. Go to “Webhosting >Subdomains” and search for your domain or subdomain.
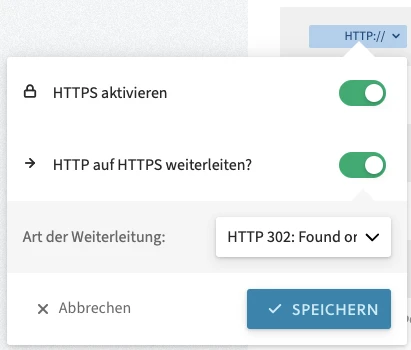
Click on the blue “HTTP://”, activate both options and then click “Save”.

The second option “Forward HTTP to HTTPS” is very useful: if your browser or that of your visitors* has saved your website with “http”, you will be automatically forwarded to “https” without being warned that “this site is not secure”.
You will now have to wait a little as the activation of your SSL certificate can take up to 5 minutes.
When the clock symbol next to your domain has disappeared, you can access your WordPress website via “https”. The address bar now reads “https://” and there is a lock in front of your address – to show that your website has a valid SSL certificate.
Congratulations – your website is now encrypted!

